Hello,
In this article, we will go through perhaps one of the easiest and best image generation tool available. Draw Things is an application available for most of the Apple devices. Everything shared on this article was generated on a MacBook Air with M1 chip and 8gb ram. This walkthrough was prepared with said MacBook, but usage should be the same across devices.
Step 1: Choosing Your Model
Draw Things App supports multiple ways of download and import models. You can directly download the model from supported websites while the app is open, and Draw Things will do the rest. You can also manually download a model, and import it to the app folder, or choose the model from your download list in the app, and draw things will set it up. For this article, we are using DreamShaper XL Lightning model available on CivitAi.
Step 2: Setting up Draw Things App (Basic Settings)
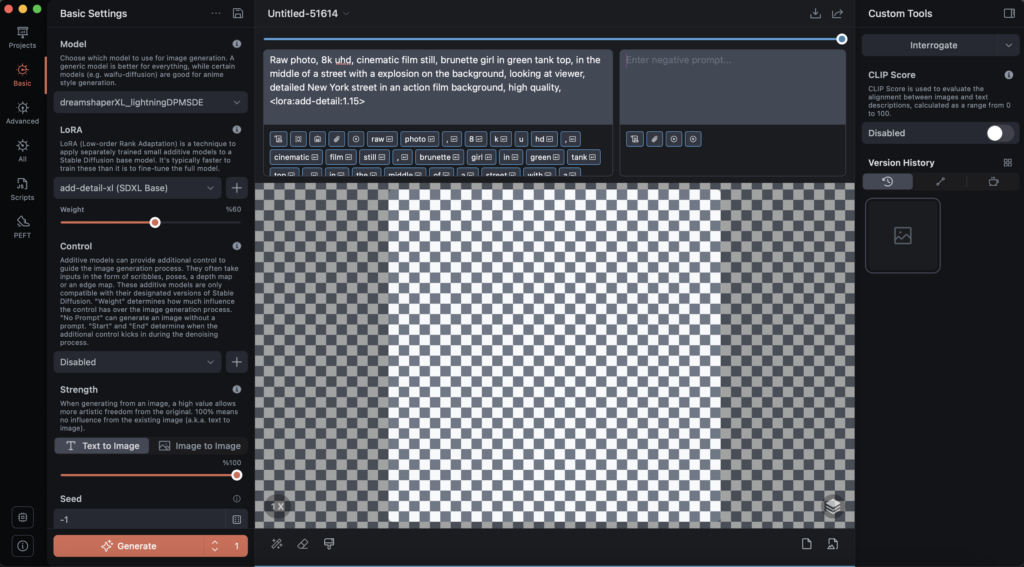
This is the page that will open up when you first start Draw Things app. You choose the model you downloaded on the left “Basic Settings” tab, through the Model drop down menu. Lora is absolutely depends on your preference. Certain LoRAs allow you to customize the generated image towards a certain style, or add details that the model may lack in creating.
In this instance, we are using Add Detail XL lora, with the optimal weight of %60. Even though our positive prompt is saying 1.15, Draw Things only accept LoRA setting through its weight slider. And %60 of weight is equivalent to 0.60 if it was written in the positive prompt. You can add multiple LoRAs, or disable the setting if you prefer. LoRA usage purely depends on you. Same with “Control”. But Strenght should always be %100 if you wish to create an image from scratch.
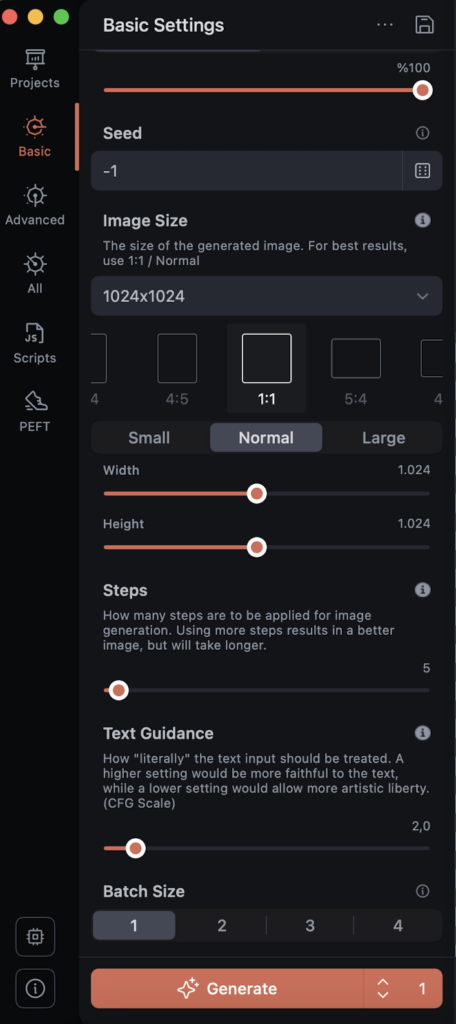
If you wish to keep generating images that will only follow the prompt, it is important to keep the seed RANDOM. On Draw Things App, random seed is equivalent to “-1” or “New Seed on Generation” on the drop down menu. This option will give each generated image a different “seed”. If you saw an ai generated image on the internet, and wish to create an exact replica of it, you can copy it’s seed, and from the same drop down, choose “Enter a Seed”.
An incredible detail on Draw Things’ behalf, is that your generated images will keep its generation settings on the image files. So that when you upload on certain galleries, such as CivitAi, the system will automatically recognize its prompt, what model was used, on what seed, etc. On your computer, or on your phone, you can inspect your generated image to copy all of that as well. ComfyUI, a local based image generation software, also has similar setting, where you can drag the generated image to use the same workflow, and do various changes before generating something else. We will get to ComfyUI later.
While Stable Diffusion 1.5 and previous models were trained on 768×768 image resolutions, SDXL and its models, generally used 1024×1024. Unless it is specified differently on the model, it is important to use the same resolution for optimum results. In this case, DreamShaper XL benefits from 1024×1024 resolution with “CFG” or “Text Guidance” of 2. Steps can range anywhere from 3 to 7, but we found the best results at 5 Steps whether we used Draw Things on M1 chip, or ComfyUI with Nvidia 4000 series graphics card.
Step 3: Choosing your Sampler! (Advanced Settings)
Continuing from above point, Seed Mode purely depends on your preference. Different graphics card, of course, will generate slightly different images even if their prompts and seed were the same. as it says on it’s text, “Nvidia GPU compatible” will try to generate similar results to an NVIDIA card while working an Apple Silicon.
While what sampler you used didn’t matter as much in SD 1.5, due to how they were trained SDXL models reinforces you to use the specific Sampler the model was trained on. DreamShaper XL will work best with DPM++ SDE Karras. SD 1.5 models often allow you to use different samplers to give your images a specific art style.
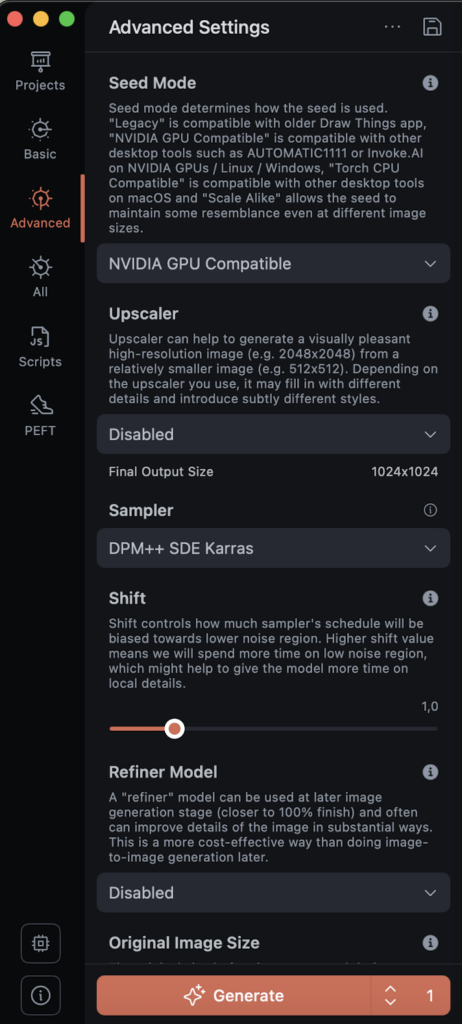
Upscaler is a good option only if you have extra time to wait for image generation. While it somewhat improved the quality of it in SD 1.5 models, SDXL models rarely require you to use an upscaler, as the models usually trained to generate a higher quality to begin with. On M1 series Macbook Air, we found it to overheat the device during generation and slow down the process. Refiner is something you can skip. Sometimes, it can help with sharpening up the results, but it is somewhat more technical. Certain SD 1.5 models benefit from using the same model as a refiner to tune up the image during generation. for SDXL, this is unnecessary.
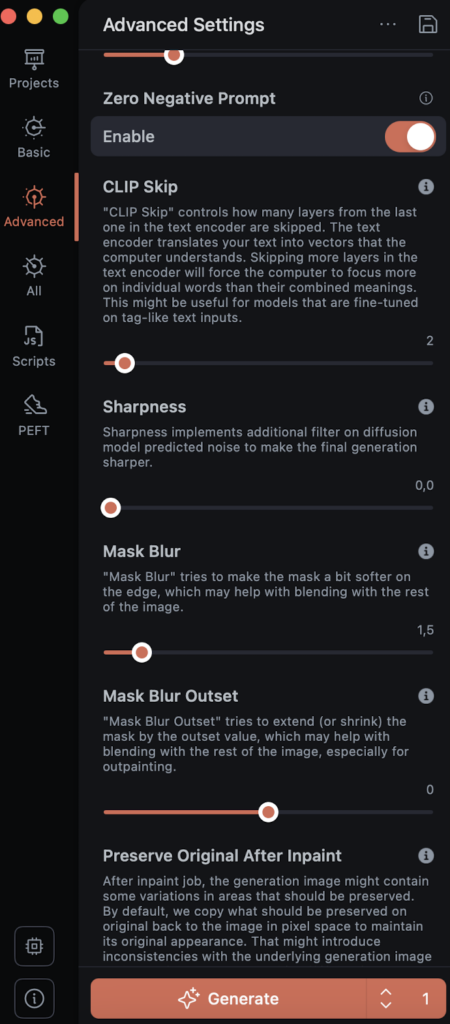
Continuing on the advanced settings, another setting you should be careful of it “Clip Skip”. Most models leave it at 1-2. Pony Diffusion XL, for example, uses -2 setting. Due to how it was coded Draw Things automatically generates on 2, which is why PonyXL rarely works on the app.
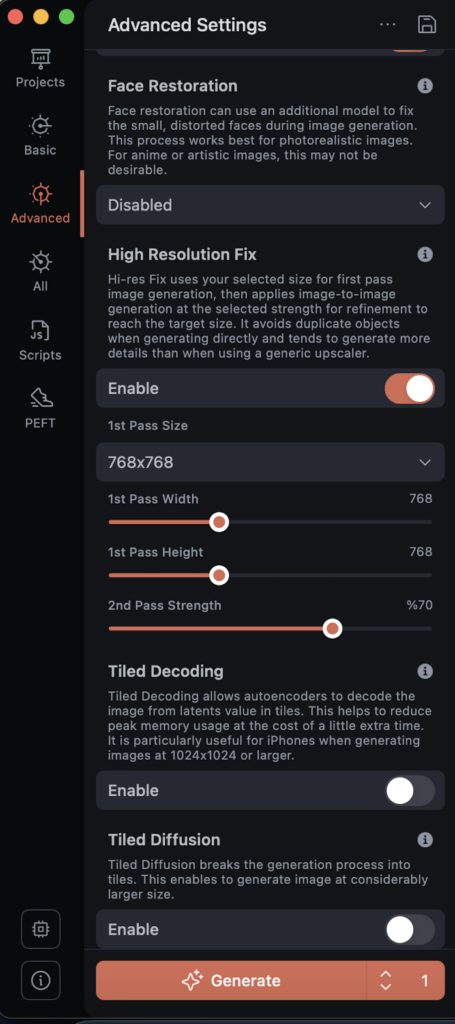
Most SDXL models do not require you to use Face Restoration, as SDXL itself is more than capable of generating decent faces. “High Res Fix” is also something depends on either the model, or your personal preference. Try generations with it on or off. An M1 chip macbook will always prefer image generation on lower resolutions than 1024×1024, which is why High Res Fix is set up on 768×768 for us. Any other setting after this point is purely optional. We can talk about T.I. Embeddings, Tiled Decoding, and Tiled Diffusion on another post later.
Step 4: GENERATE!
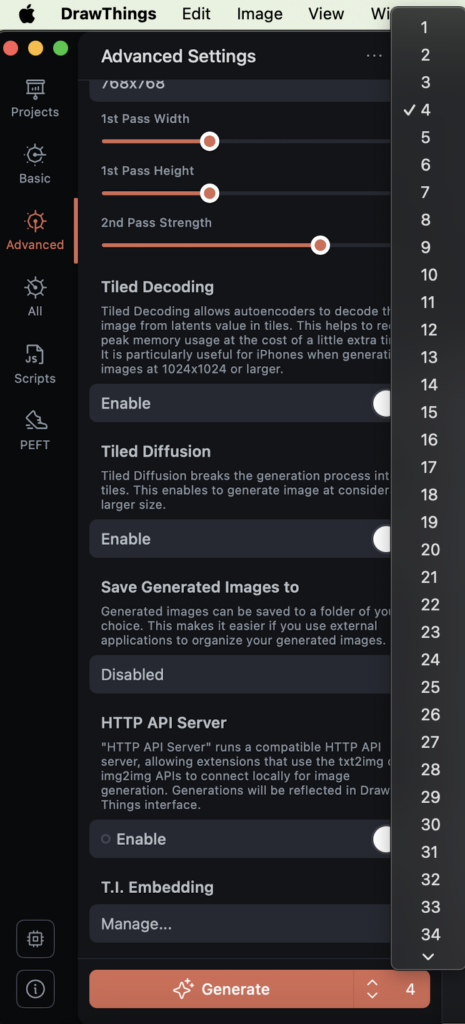
For all things considered, you can now hit Generate while choosing how many of them you wish to generate from the drop down menu next to it. We recommend 4-5 generations before stopping, as 1 or 2 generated images of the same prompt can sometimes not give a result you may find appealing.
Our Positive prompt was;
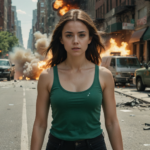
Raw photo, 8k uhd, cinematic film still, brunette girl in green tank top, in the middle of a street with a explosion on the background, looking at viewer, detailed New York street in an action film background, high quality,
with No Negative prompts.
Let’s take a look at our result;

Leave a comment to let us know if you found these tips useful, and send us your generated images on Twitter with @WaifusAway or @WaifuIsekai on Instagram!
Leave a Reply